3.13.2012

Spring Thaw

Even though we haven't had much of a winter here, I still can't wait for the warmer, longer days that March brings. We've had unseasonably warm weather here the past few days, making me want to fire up the grill and eat dinner on the patio. Though its not quite that warm yet- we can still get into a sunnier state of mind with bright spring flavors and fresh produce.

Last night for dinner I made cod fish en papillote (which is a fancy way of saying cooked in parchment paper) with fennel and citrus, and a quinoa salad with avocado, orange segments, red and green onions, and edamame, also in a citrusy vinaigrette. Both are healthy and simple to make, and have lots of crossover ingredients, making shopping a cooking easier.


Citrus Cod en Papillote with Fennel

Crank up your oven to 400 degrees, and tear off four 12 x 12 sheets of parchment paper.

Trim off the top green portion of two fennel bulbs, saving the green fronds for later. Half the fennel, and slice them as thinly as you can from the tip to the root. Toss the fennel slices with a good drizzle of olive oil, a sprinkling of salt and pepper, and the juice from two oranges and one lemon. You can even add a little zest if you feel like it. 

Portion the fennel evenly among the four pieces of parchment paper, and top each pile with a portion of cod (roughly six ounces each), seasoned with salt and pepper on each side. Pour the juices from the fennel evenly over each fish, and add a splash of white wine as well (roughly a tablespoon each). Grab all the edges of the parchment and roll them as tightly as you can to seal in the steam. At culinary school we did all these fancy tucks and sealed them with egg wash and olive oil- but crumpling it up around the edges works just as well!

Bake the parchment paper packages in the oven for ten to fifteen minutes- depending on the size and thickness of your fish. Check to see if its cooked through, and if not, just add a bit more wine and close it up again for a few more minutes in the oven. 

Slide the fennel and all the juices, with the cod on top, into a shallow bowl, and top with a few fennel fronds if you like. 


Citrus Quinoa Salad 

Cook the quinoa (mine comes in a two cup package) according the the package directions, making sure to salt the cooking water to give some flavor. Once all the liquid has been absorbed, turn off the heat and add three cups of shelled frozen edamame. Cover, and allow the residual heat to cook them. 

Toss the quinoa with 1/4 cup of olive oil, salt, pepper, and the juice of two lemons and three oranges, to taste. gently fold in orange segments from two oranges, 1/4 red onion (thinly sliced), six green onions (thinly sliced) some of the reserved fennel fronds, and two avocados (thinly sliced). Mix everything together gently and allow to stand for a bit, checking the seasoning and adding more olive oil or lemon/orange juice to suit your own taste. 

This pairs really nicely with the cod fish, but its also great cold the next day, with some chick peas mixed in, for an easy healthy lunch. 

8.28.2011

Easy Summer Asparagus


At a loss for what to make for dinner tonight, I went to Whole Foods, which was surprisingly open considering everything else in town is closed in the wake of hurricane Irene. They had the most beautiful asparagus for sale, and I decided to make something simple and easy with it.

Preheat your oven to 400 degrees. Then simply wash one bushel of asparagus, and bend it slightly towards the bottom. The asparagus will naturally click off where the good part ends and the tough part begins. Discard the bottom bits which are too tough to eat, and lay all the asparagus out in a single later on a baking sheet. Drizzle generously with good olive oil, the juice of 1/2 a lemon, and a generous sprinkling of salt and pepper. Bake in the oven for ten minutes, then take the sheet out and grate three or four tablespoons of good Parmigiano Reggiano cheese over the asparagus. Return to the oven and cook for another four minutes. Remove, and transfer to a platter. Grate over more cheese to taste, add a bit more salt and pepper if you like, and enjoy!

I served this with my favorite Summer Corn Salad and Barefoot Contessa's Lemon Chicken Breast, and I add 1/2 a chopped onion to the mix before roasting. Also, After the chicken is finished roasting, I keep the pan with the juices on the stove, heating over medium high, and whisk in 1/4 cup of flour to thicken. This makes a really delicious and impressive sauce to serve with the chicken. Your whole house will smell amazing!


Peanut Butter Cookies

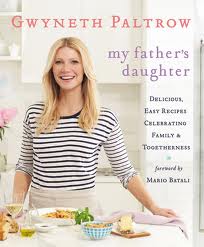
Gwyneth Paltrow's new cookbook My Father's Daughter is full of amazing recipes. I can relate to Paltrow, who inherited her culinary inclination from her father. I too was inspired to cook by my father, who whipped up meals effortlessly before my eyes when I was little, and gently taught me all the cornerstones of cooking at a young age. To this day, even with my culinary passion in full swing and with me starting culinary school in a few short days (fairly confident that I am the resident culinary authority in any given household), my father never falls short in giving indispensable and imperative advice when we cook together.

Aside from the gorgeous photography in My Father's Daughter, the book has a well edited collection of really delicious meals perfect for sharing with family and friends. Also apparent throughout the cookbook is Paltrow's penchant for health-conscious food, and she suggests substitutions throughout each recipe to make each dish more diet or health friendly.

My current favorite recipe is for Peanut Butter Cookies, and it has proven the perfect selection to send out in college care packages. With a step-brother and a boyfriend both away at college, I needed a way to send a little bit of love long-distance. These cookies are very moist and keep very well when wrapped in parchment paper, even when sent through the mail.

I have adapted this recipe slightly from Paltrow's recipe in My Father's Daughter, but she obviously deserves all the credit!

Preheat your oven to 350 degrees and line a baking sheet with parchment paper. In a mixer fitted with a paddle attachment, cream together one stick of room-temperature salted butter, 3/4 cup smooth or chunky peanut butter (depending on your preference), and 1 cup packed light brown sugar. Once well combined, add one egg and a generous splash of good vanilla extract (about 1/2 tablespoon) to the mix. With the mixer on low, add 1 and 1/2 cups of all-purpose flour in 1/2 cup increments, and then add 1/2 teaspoon baking powder and 1/2 teaspoon baking soda. Mix together until just combined, then turn the mixer off and add 3/4 cup of roughly chopped peanuts, and one cup peanut butter chips. Mix by hand until combined.

Form the dough into golfball sized cookies, and space them about an inch apart on your baking sheet. Using a fork, gently press down each cookie to flatten slightly and leave little groves. If you like, you can sprinkle a bit of demerara sugar (also known as turbinado or natural brown sugar) over each cookie, and it will catch nicely in the grooves you made with the fork.

Bake the cookies for roughly 14 minutes, until they have firmed slightly on top but still have a bit of softness beneath. Allow to cool on the baking sheet for a few minutes then transfer to a plate and enjoy, preferably with a tall glass of cold milk.

If you want to send these cookies in a care package, wrap each one in a little bit of parchment or wax paper, and put them all in a plastic ziplock bag. Whoever you send them to will definitely feel very loved.


Classic Southern Fried Chicken


All this unsettling weather (an earthquake and a hurricane in the same week!) has made me more inclined to cook up cozy, comforting foods. My latest issue of Food and Wine Magazine featured a spread on the food from the new movie The Help. Both the book and the movie feature Southern food at the forefront, and make you want to run out and fry up some chicken.

For a girl who does most of her grocery shopping at Whole Foods, the idea of buying the requisite can of Crisco was a little out of my comfort zone. But once I scooped the frosting-like white fluff out of the can and heated it in my big Le Creuset, it bubbled up "like a song," and cooked the chicken to golden brown perfection.

This recipe should be prefaced with my first foray into frying chicken. I was fifteen and set out to fry up two big pans of chicken, heating the oil on high and not paying attention to the warning smoke swilling up from the oil. Suddenly both pans burst into flames, chicken and all. Alone in the house, I naively though water would solve my problems (fire should theoretically be extinguished by water, right?). Any savvy person knows that water on an oil or grease fire only increases the problems, and in my case caused the pans, which I had somehow gotten outside onto our brick patio, to explode flames five feet up into the air. Its a miracle I didn't burn off all my hair and burn the house down in the same stroke. The fire died down, and my mom found me covered in soot from the fire, but with two plates of perfectly cooked chicken. That was the second miracle of the day! The patio still has grease stains seven years later, but I'd say the chicken was worth it.

To avoid a disaster in the making, make sure you have a thermometer set in the oil while it heats slowly over medium low heat. And if anything catches on fire, reach for a pan to cover the fire and cut off its oxygen. But if you proceed slowly, you really shouldn't have any problems.

Heat 24 oz. Crisco (roughly 1/2 of a large can) over medium low heat in a large deep pan. I use my largest Le Creuset. Heat the Crisco until it reaches 365 degrees on a thermometer. While the Crisco is heating, wash a four pound chicken, cut into eight pieces, and dry it throughly with paper towels.

In a large bowl, whisk together two large eggs and 1/2 cup milk or buttermilk. I like to use buttermilk because it tenderizes the chicken and adds a nice tang. Add the chicken pieces to this mix and turn them around so they're covered. In another large bowl, mix together 1 and 1/2 cups all-purpose flour, one tablespoon seasoned salt, and one tablespoon seasoned pepper. Using tongs or your fingers, drain the excess liquid off each chicken piece and dredge them one by one in the flour mix, coating all sides evenly and shaking off any excess. Gently lower the pieces into the oil so you don't get splashed!

Once all the chicken is in the pan, increase the heat slightly to keep the temperature of the oil more or less steady. Cook the chicken for twenty to twenty-five minutes or so, until a thermometer inserted near the bone reads at 170 degrees. Make sure you turn the chicken pieces often to brown it evenly on all sides. Drain the chicken on paper towels and eat immediately! If you have leftovers, they keep well in the fridge and taste just as good cold the next day.

I served my chicken with these biscuits and this fig salad, and a chilly bottle of rosé wine.


8.27.2011

It's Getting Dark and Stormy Out There


With hurricane Irene threatening pretty much the whole Eastern Seaboard, people are stocking up on provisions and essentials to weather the storm. In the advent of such a historic hurricane, I can't think of a more appropriate cocktail then a Dark and Stormy. 

The ingredients are simple and easy to keep on hand- and the drink comes together faster then you'll get soaked in a downpour. For my Dark and Stormy, I use the classic Gosling's Black Seal Bermuda Black Rum. You could use any dark rum you have on hand, but I think this is the most authentic. 

Fill two tall glasses with ice, and then pour over two shots of dark rum. Add 1/2 a shot of Rose's Sweetened Lime Juice, and fill almost to the brim with a good ginger beer. Squeeze 1/2 a lime over each glass, and use the other half to slice for garnish. Stir to combine, turn off the news, and enjoy!


8.25.2011

Summer Side Dishes

The other night for dinner I decided to make one of my favorite salmon recipes from the Barefoot Contessa. Its really simple to pull together and cooks up in a flash, just a few minutes on the stovetop and 12 minutes in the oven- and you've got fool-proof delicious salmon. The panko crust adds a contrasting crunch, and the lemon zest and the dijon mustard give the salmon a nice kick. I'll link the recipe here- definitely give it a try.

For sides to pair with my salmon, I made an old favorite and a new one I just put together. The old favorite is my corn salad, which is hands down my favorite summer dish. I would probably make it every night of the week from May through August if I could- it's that good. And my new corn stripper from William Sonoma that I just discovered makes this salad come together in no time, with much less mess. At twelve bucks, it's been the best buy of the summer!

To make the corn salad, start by heating a good splash of olive oil to a large skillet over medium heat. Chop up two or three garlic cloves to taste, and add them to the hot oil. Heat the garlic for a few minutes while you get on with the corn, making sure not to brown the garlic too much. Strip the kernels off of ten ears of white or yellow corn and add them to the garlic and oil, and sprinkle generously with salt and pepper. Cook the corn for about eight or ten minutes, until its tender but still has a little crunch when you taste it. Take the corn off the heat and pour it into a large bowl, allowing it to cool slightly before adding the other ingredients.

To the corn, add two cups halved cherry tomatoes, one cup small mozzarella balls (halve them if they're not bite-sized), two avocados diced in large chunks, 1/2 cup finely chopped basil, and a splash of balsamic vinegar. Mix everything together well, and taste for salt and pepper. If you're making this slightly out of season when the corn isn't as great, add a tablespoon of honey or agave to mimic the sweetness of summer corn. This salad keeps really well in the fridge, but odds are there won't be much leftover after dinner!


The other side dish I came up with while wandering around the supermarket, which featured homemade pesto from a local farm and really great looking asparagus. All you have to do is boil up a big pot of salted water, and cook a box of whole wheat orzo per the instructions on the box. During the last three minutes of cooking, add one bunch of asparagus, cut three times down the length of the stalks to make them manageable.

While everything is cooking, roughly chop up three or four cups of fresh spinach and add to the bottom of a big bowl. Drain the orzo and asparagus, and dump everything over the chopped spinach. The heat from the orzo will steam-cook the spinach perfectly.  Add 1/2 a cup of pesto, homemade or whatever you've got on hand, and drizzle on some olive oil, mixing to coat everything evenly. Chop up two scallions, white and green parts, and add to the mix. Next, add the zest of a whole lemon and the juice of half the same lemon, more to taste if you like, and sprinkle on some salt and pepper to taste. If you feel like it, top the dish with some fresh basil, and enjoy a healthy veggie-loaded take on a pasta side dish!


8.16.2011

Revamped Bruschetta


Considering I've made this Classic Bruschetta more times than I can count, you would think it would have lost some of it's appeal. But despite its regularity, it remains one of the things my friends and family ask for most. If you haven't made it yet, definitely give it a go before the summer tomatoes disappear. But if you have made it and are looking for something a little different, try adding ten hulled and roughly chopped strawberries to the tomato mix before you pile it on top of your baguette.

The strawberries meld seamlessly with the tomatoes, and add a new depth of flavor to the bruschetta. It doesn't taste of strawberries, but rather like the flavor of the whole dish has been turned up. And since strawberries traditionally pair so well with balsamic, it really isn't as off base of a paring as you might think.

Serve this up to highlight some of the most delicious produce summertime has to offer- your friends won't know what hit them!

Summer Fruit Crumble


All the ripe fruit in the grocery store this time of year just begs to be baked into a big yummy fruit crumble. You can do any combination of fruits depending on your preference and what looks best in your local store, but my favorite in August are definitely peaches and strawberries. Crumbles are ridiculously easy to throw together, and don't really even require precise measurements like most baked desserts. Their ease makes them the perfect summer dessert, and as they bake they make your whole home smell heavenly. Feel free to use any combination of fruits here- when I made this last night I threw in a few leftover figs I had hanging around and they melded in perfectly.

I leave the skin on the peaches (six small or four large) mostly because I cannot be bothered to peel them, and also because the skin is actually really good for you. I just wash and de-pit them, then quarter them and toss into a large pie dish with about ten hulled and quartered strawberries. To this mix add a handful of flour (I use whole wheat flour here) and two or three tablespoons of brown sugar or agave nectar. Add a splash of vanilla and the juice of half a lemon, and some lemon zest if you feel like putting in some extra effort. Mix this all together and spread it out evenly in the pie dish.

For the crumble topping, mix two handfuls whole wheat flour, two handfuls quick cook oats, three or four tablespoons of brown sugar, and a splash of vanilla together in a bowl. Dice one and 1/2 sticks of salted butter just out of the fridge, and add to the bowl. Using your fingers, work the butter into the flour mix until the butter is roughly the size of peas. Spread the topping over the fruit, making sure to cover all of the edges. Bake for thirty-five or forty minutes, until a knife can be inserted into the fruit easily and the topping is golden and crisp.

Serve this up with some vanilla ice cream and you'll have some very happy people!


8.14.2011

Keep it Light


After work and before dinner, I think its really nice and relaxing to put out a little spread of snacks to have with some wine or prosecco so everyone can unwind and catch up on each other's days. I usually put out a few cheeses, some hummus and carrots, and maybe a few grilled shrimp. Lately I've been adding these cucumbers to the mix. I like the kirby cucumbers best- they're smaller and crunchier, with less seeds.

Just cut the cucumbers in half lengthwise, then again through the middle, and arrange seed-side up on a plate. Drizzle with a little bit of olive oil, sea salt and pepper, and a few tablespoons each of fresh basil and mint chopped up together. The mint adds a nice brightness that makes the cucumbers even more refreshing, and the basil adds a hit of flavor that makes this dish really special.

Best Fig Salad


Figs are one of those illusive items that only appear in stores for a fleeting few weeks, usually unannounced and never for long enough. So when I spot them in Whole Foods, I snap up a bunch and usually make this delicious salad several days in a row. Its really simple to pull together, and makes for a great light lunch alone or paired with some simple grilled fish its an easy summer dinner. If you have any leftovers (which I rarely do with this!) it keeps will in the fridge and is perfect for picking at throughout the day.

Wash your figs (around ten makes a good portion) and trim off the pointy tops (about 1/4 inch down) then quarter them. Place them all on a platter or a shallow bowl and layer over quartered cherry tomatoes, quartered mozzarella balls, and a big handful of chopped basil. Drizzle the whole plate with balsamic vinegar, olive oil, pepper, and sea salt. Sometimes if I'm in the mood I add a light drizzle of honey as well, and if I have ripe avocados on hand, they add a nice creamy touch to the salad.

One of my all time favorite chefs inspired this recipe with a similar fig salad in his Happy Days cookbook (Definitely worth picking up!). He adds some ribbons of prosciutto, which is a nice salty counterpoint to the sweet figs.


8.05.2011

Peach Mint Fizz

While the weather has cooled down substantially since the Dante's Inferno style heat wave we had last week, its still summer out there, which merits a refreshing drink to cool you off. This Peach Mint Fizz does just that- and comes together in a flash. And with supermarkets stocked to the brim with fresh peaches, its easy and seasonal to make.


Get a sieve and press 3 or 4 chopped up peaches through, along with a small handful of fresh mint. To get all the good pulp through, pour over a splash or two of gin (I use Tanqueray), and smash everything through with a spoon. Add four tablespoons of agave nectar to the mix, and stir in your desired amount of alcohol. This mix will keep well in the fridge until you're ready to use it. When you're ready to serve, fill a glass with ice and then fill it half way up with the peach mint mix. Then top up to the brim with your favorite sparkling water or seltzer and enjoy!

Put Those Boys to Work!

My feeling is, if I spend a few hours cooking up a big impressive meal (hey even if I spend twenty minutes throwing something together!) I shouldn't have to do the dishes. That job goes to the lucky people who ate the meal with me. The cook shouldn't have to be the cleaner too! I put these two well-fed boys to work on the dishes after dinner, and I even let them borrow a few aprons. Don't they look excited?


Heirloom Jersey Tomatoes

Whole Foods this week had the most gorgeous selection of heirloom Jersey tomatoes from a local farm. Though they come in odd shapes and irregular colors, they have so much more flavor then regular run of the mill tomatoes, and they look so pretty sliced and plated all together.

I picked up red, orange, yellow, and green tomatoes, sliced them to roughly a 1/4 inch thickness, and arranged them on a bed of arugula tossed with olive oil, balsamic vinegar, sea salt, and pepper. Then I roughly tore up some fresh Jersey mozzarella and gave everything another drizzle of oil and vinegar, and a little more sea salt on the tomatoes. When all your ingredients are this fresh and local, they don't need a lot of help to taste super delicious.

You can serve this up by itself, or toast some bread to soak up all the yummy juices at the bottom of the bowl.


8.12.2010

Red Velvet Cupcakes

I have amassed quite a large collection of baking cookbooks in the past few years. Something about the pastel colors of the frosting, the old-fashioned look of a big tall cake slathered in butter cream, and the big plate of cupcakes just compels me to buy the books. (I'm obviously a marketing and sales team's dream consumer). Though I love all of these cookbooks, there is one that I always turn to when I actually want to bake something. The other ones I pull out when I want to get inspired by their glossy pictures or read through the recipe introductions to indulge my inner cookbook nerd.
The pages of my copy of "The Buttercup Bake Shop Cookbook: More than 80 Recipes for Irresistible, Old-Fashioned Treats" are tattered and gunked up with spilled frosting and batter, and when I close it there's always a puff of flour that's been wedged between the pages for who knows how long. But that's the way cookbooks are supposed to be- well-loved and worn in and covered in smatterings of all the delicious things you've cooked out of them.


I love everything I've ever baked out of this cookbook, but one of my all time favorites is their red velvet cupcakes. I frost mine with the cream cheese frosting listed in the frosting section- I love the not too sweet tang of the cream cheese against the deep chocolaty richness of the red velvet cake. Pair one of these with a big glass of cold milk, and I swear you can win over just about anybody.
I've dusted these ones with a bit of coco powder.


These ones have a bit of glitter sugar and some sugar pearls.

Bruschetta

For summer dinner parties, you don't want to spend your time slogging around your hot kitchen, fussing over some hot, complicated dish that you know is best saved for January, when sweating isn't such a problem. I absolutely hate being sweaty- I really can't handle it. I get very aggitated and uncomfortable and have to go lie down in a cold room for a while and regroup. At the gym I select my workout mahine based on which one is closest to the fan. I don't know what it is- I guess I'm better suited for cold climates and snow. I chose to study abroad in Sweden- like by the Artic Circle.

Anyway- in the summetime you want things that are light, quick, and simple to make, and preferably don't require you to turn on the stove or oven for too long. Fortunately- in the summertime everything is so fresh and seasonal that you don't need to do too much to make a really stellar dish. Its actually best if you don't fiddle around with the food too much, so cut some corners and make your life a little easier!

Here is the recipe for bruschetta, one of my favorite summer dinner party starters. Its perfect because you can mix up the tomato bit and slice the bread in advance, then just before your guests arrive you can throw it all together and leave it out for everyone to enjoy. Make sure you put out some plates or napkins, these can be very messy (in the best way).

Recipe:

Take two boxes of cherry or grape tomatoes and slice them all in halve so they can absorb all the good flavors you're about to add.

Drizzle the tomatoes with two tablespoons good olive oil, three tablespoons balsalmic vinegar, and one tablespoon honey. Summer tomatoes are sweet- so play up that flavor.

Dice up one or two cloves of garlic- depending on your taste, and add that to the mix. Finely chop two green onions or scallions (the white and the green parts) and add that too.

Gather about a half cup of fresh basil leaves and slice these into nice thin strips and toss them into the bowl. Salt and pepper the whole thing to taste, give it all a big stir, and let the whole thing sit in the fridge for a bit. You can let it sit for a few hours- but try to give it at least twenty minutes to let the flavors amalgamate.

When you're ready to serve, Slice a baguette into half inch diagonal slices and spread them out over a baking sheet. Drizzle with a bit of olive oil and some salt and pepper, and put it under the broiler for just a few minutes. Broiling the bread gives it a nice crusty texture that soaks up all the tomato flavor (it also keeps the hot oven sweat-inducing time to a minimum). Watch these closely- the line between golden brown and smokey black is a very thin one.

When the bread is all toasty and golden, plate it up and top with the tomato mixture. If you want to get fancy, drizzle the whole plate with a bit more olive oil and some chopped up basil. Serve these with a bit of chilly white wine and a big bowl of grapes and you will have some very happy guests.

8.06.2010

Chocolate Raspberry Pavlova


One more picture- its just so pretty.

Business Time

Bear with me- the next few posts are going to be shamelsss promotion of my new baking and cooking business palmerbee. I just started it in June and so far I've done nineteen orders! Very exciting- or at least I'm very excited. Not too bad for a history major/ art history minor with zero business sense and even less math skills (I had to take algebra twice- enough said).

This first recipe is one of my all time favorites. Its a Chocolate Raspberry Pavlova from Nigella Lawson's cookbook "Forever Summer." Whenever I bake it, the gorgeous pavlova is reduced to crumbs in a ridiculously short amount of time. I had one woman order this for Friday, and on Saturday she ordered another one to be delivered straight away!
Nigella Lawson's cookbooks were some of the first ones I attempted to cook from when I was around twelve or thirteen. Those were awkward years for many reasons (the haircut that made me look like one of the Beatles? Flared jeans?) but certainly for my lack of culinary skills. I made a whole series of absolutely atrocious things (they can't even really be called food because they were inedible), but finally started to get the hang of it as I worked my way through Nigella's books. Both the Food Network and The Cooking Channel have started airing her show again- which you have to watch both for the amazing recipes and for Nigalla's sassy unabashed passion for food. Any woman who ends her show bathrobe-clad at midnight, paddling down to the fridge for a few more bites of whatever decadent dish she made that day is certainly one I want to watch.

Recipe:
Preheat the oven to 350 degrees, and line a baking sheet with some parchment paper.

In the bowl of an electric mixer, beat six large egg whites untill they are all satiny and marshmallow-y. If you have trouble getting egg whites to cooperate, make shure they are right out of the fridge, and try sticking your bowl and beater in the fridge for a bit before you use it.

With the mixer running, add one cup of granulated sugar spoonful by spoonful, and beat until the egg whites have been transformed into into a big glossy stiff pouf that sticks to the beater and holds firm peaks.

Sprinkle over three or four tablespoons of good coco powder, a splash (around a teaspoon) balsamic vinegar, the same amount of vanilla extract, and two or three ounces of dark chocolate (around 70% coco), chopped as finely as you can muster.

Gently fold all that chocolate into the egg whites, working under and over so you don't deflate the egg whites. Don't be too timid though, you want everything well mixed, and the egg whites can take a bit of mushing around.

Pile the mixture onto the prepared pan, and form into a big fat disk. Don't smooth it out too much though- you want some peaks to get a balance of crisped and soft meringue. Place in the middle of the oven, and then immediately lower the temperature to 300 degrees. This gives you the crispy crust while still keping the middle soft and delicious.

Bake for around an hour. You'll know its done when, according to Nigella, "it should look crisp around the edges and on the sides and be dry on top, but when you prod the center you should feel the promise of squidginess beneath your fingers."

Turn off the oven and open the door slightly, allowing the meringue to cool completly beofre taking it out. When you're ready to serve, plate the meringue and top with some freshly whipped heavy cream (about 8 ounces) mixed with a bit of vanilla extract and a bit of sugar. Pile the whipped cream into the sunken crater that formed as the meringue cooled, and then top with any combination of berries you have on hand. Raspberries are beautiful, but strawberries work nicely as well. You could also do passion fruit or pomegranate seeds in the winter when berries are exorbitantly priced and flown in from far-off places. If you want to get fancy, you can top the berries with some chopped chocolate, powdered sugar, or coco powder.

8.05.2010

Gazpacho

If you've been overindulging a bit lately, or slacking with working out because you'd rather be at the beach or doing something else fun and summery, then gazpacho is the perfect dinner. Its also the best thing both to cook and to eat when its as hot and disgusting as it has been on the east coast lately. Who wants to turn on the oven or heat up the grill when its 109 degrees outside? I tried, and it wasn't too pretty.

This recipe is inspired by one of my new favorite cooks- Ree Drummond. She has the most amazing blog called The Pioneer Woman Cooks, and a new cookbook out as well. She is so sassy and honest and hilarious, you have to read her blog: http://thepioneerwoman.com/cooking/. She also does really helpful frame by frame photos of every step as she cooks.

Recipe:
In the bowl of a food processor (you can use a blender too but it won't have quite the same texture), blitz together six cloves of garlic (I'm a garlic nut so obviously add as much or as little as you like), 1/2 a red onion, one large cucumber, six or seven large tomatoes, one zucchini, 1/2 a bottle of tomato juice, 1/4 cup extra virgin olive oil, 1/8 cup red wine vinegar, 1/4 cup honey (depending on how sweet and ripe your tomatoes are), and six dashes Tabasco sauce.

Be careful not to overly blend the mixture- you're aiming for a slightly chunky look where you can still discern what vegetables are actually in it.

Pour the mixture into a large bowl, and add the kernels of two ears of cooked corn. Add salt and black pepper until it tastes right to you, and add a bit more tomato juice if you're going for a more soupy gazpacho. Slap on some plastic wrap and throw the whole thing into the fridge for a few hours to let all the flavors amalgamate and come together properly.

After the gazpacho has chilled, give it another big stir and check the seasonings again. Dish it out into big shallow bowls (or whatever you have on hand), and top with some sliced avocado, some grilled shrimp, a snipping of chives, a drizzle of olive oil, more salt and pepper - whatever you have the energy for. The gazpacho is equally delicious eaten straight from the fridge with no fanciness added. If you want to make a meal of it, serve with some crusty bread drizzled with olive oil and toasted until golden brown.

Magic Squares

Today I made some Magic Squares- also known as Seven Layer Bars depending on who you ask. I went to an all girls Catholic high school, and when our dining hall would bake up a batch of these for lunch, the girls would just go wild. Those pleated kilts hid a few extra pounds, and because of the lack of boys, the girls were unabashed about their zealous need to grab as many bars as they could carry. Okay- I'm not going to pretend I didn't do it too. I jumped up with the rest of my class as the dining hall man whispered to  his coworker "I give it sixty seconds," as he lowered the tray stacked high with Magic Squares. It probably took closer to thirty seconds for the plate to be wiped clean. Thank god there weren't any boys around- they would have been horrified at the stampede of gluttonous girls launching themselves at the dessert.

This recipe is my attempt to recreate those stampede-inducing Magic Squares, and I think I've gotten pretty close. These never seem to last very long whenever I make them. I give it four hours...

Recipe:
Preheat the oven to 350 degrees, and grab a baking pan about 12'' x 6'' and about 2'' deep.

In the bowl of an electric mixer, crush one box of graham crackers and combine with one stick of room temperature butter and a splash of good vanilla extract.

Tip the graham cracker mixture into the pan and smoosh it all down so its evenly distributed and as smooth and flat as you have the patience for.

Over the graham cracker mixture, layer any combination of chocolate chips, peanut butter chips, white chocolate chips, crushed heath bars, M&M's, slivered almonds, hazelnuts, whatever you like. It should end up covering the graham cracker crust in a thin even layer- probably 1 1/2 cups in total (depending on how gluttonous you are).

On top of your chocolates of choice, spread a thin layer of shredded coconut, and as many mini marshmallows as you like.

Once you're satisfied with your layers of deliciousness, pour one can of sweetened condensed milk over everything as evenly as you can.

Bake for 20-25 minutes, until the coconut is browned, the chocolate slightly melted, and the marshmallows all golden and puffy and caramelized on top.

Allow to cool in the pan (or if you're desperate just throw them in the fridge). When they're cooled, cut into squares. You should get between 12 and 14 bars- depending on how fatty you want your bars to be.

Salted Caramels

I made the most insanely good salted caramels today. I'd never made any sort of candy before and had to buy a candy thermometer to make sure I didn't mess them up. But they were actually really easy to make- and they look impressive when they're all wrapped up in parchment paper.  They won't last very long though- get ready to crumple up all the pieces of parchment paper you carefully cut and wrapped them in!

The recipe is from Ina Garten- The Barefoot Contessa, who is one of my all time favorites. Whenever I watch her show I find myself wishing I was invited to one of her ridiculously delicious Hamptons dinners- and then I just end up trying to recreate whatever it is she was making. That's how I was inspired to make these- and now I'm starting to regret it because they are completely addictive. But make them none the less- your friends and family will love you forever.

Here's the recipe: http://www.foodnetwork.com/recipes/ina-garten/fleur-de-sel-caramels-recipe/index.html

I used Maldon sea salt because that's just what I had- and they turned out deliciously and just as pretty. I also stuck the pan right in the freezer once I'd poured the caramel in- I was feeling very impatient and wanted them out as quick as possible. After about five minutes they were good to go and ready to roll and slice- so do what your level of patience allows you.